Roughly 12 months ago VMware completed the purchase of Salt, a configuration management platform, based on open source tech. Since then, VMware have been integrating it into its vRA (vRealize Automation Platform), and you can now manage your infrastructure from the cloud. Lets see how we get on…
Let’s get right into this, what is Saltstack Config? Previously, the product was known as SaltStack Enterprise, based on the popular and well-established opensource Salt (which is still very popular I’d like to add) and originated from way back in 2011. VMware bought SaltStack in October 2020 to become an ‘integral part of the vRealize Automation product line’ and a year later that is very much happening.
To give you some interesting stats on Salt (I was amazed by these!):
- Over 100,000 code commits
- More than 2,100 unqiue contributors (with 300 just this year)
- 50+ annual downloads
- Top 50 in the GitHub Repo
If you’re new to this line of IT, I will explain a little bit about its capabilities. Firstly, you’re likely to have heard of some of Salt’s competitors, Ansible, Puppet or Chef. In fact, if you’re a follower of this blog, you’ll know I did a little bit of Ansible a year or so back. So what does it do? Essentially it’s main functions are software automation, configuration management and security. What does that mean aside from the marketing buzzwords. Essentially, you can use SaltStack Config to:
- Deploy and configure software and systems as code, whether it be Windows, Linux, Mac or Unix
- Set a standard or ‘desired state’ across individual servers, groups of servers, or all of your environment
- Keep software up to date, and also scan your estate against known vulnerabilities
- Audit your estate against well-known compliance standards, such as CIS benchmark
SaltStack Config Architecture
Saltstack configurations are made on what is termed a ‘master’, essentially a console (hosted either in the cloud by VMware or on prem, by you) and each target is given the term minion, essentially this is a publisher-subscriber model. Unlike Ansible which is agentless, but relies on SSH, Salt has the option of either using the minion agent or using SSH as a fallback. The agent is deemed more secure, given that you don’t have to leave the SSH service running but it works either way. Salt requires only 2 ports to be open on the minions, TCP 4505 & 4506. The underlying communication is done by the ZeroMQ messagebus, an open source messenging library, which is multi-OS and is built asyncronously giving a scalable, fast communication method. tl:dr – its fast, reliable and works on near enough every OS.
I’ll assume at this point that you’ve already built your master or have it hosted by VMware as part of vRA Cloud. But if not, here are some pretty simple instructions
Enterprise vs Open Source
I think its right that I call out at this point the main differences between Salt (the open source version of Salt) and SaltStack Config.
Firstly, Salt Open is completely free to use, and will continue to be – VMware are the main sponsor behind this, and a majority of the contributors are actually VMware employees, so what I’m saying is that its not disappearing.
Technically though, there are some major differences, I thought it be useful to call out some of the differences:
| Salt Open | Saltstack Config | |
|---|---|---|
| Interaction | cmdline only | cmdline & UI |
| Cost | Free | Paid |
| Access Control | None | Full RBAC |
| Integration | None | vRA / Tenable / ServiceNow, etc |
| Inventory | None | Full inventory |
| OS Support | Linux / Unix / RaspPi / Windows / Network Equipment | Linux / Unix / RaspPi / Windows / Network Equipment + Solaris & AIX |
| Compliance | None | Audit & Compliance Included |
| Vulnerability Mgmt | None | Scans and remediates vs CVEs |
| History / Audit Control | None | Job history and audit trails |
Minion Installation
How to Install on Windows
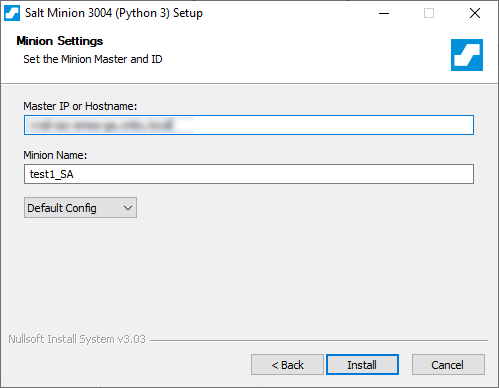
Once you’ve got the master up, you’ll want to add a couple of minions to start testing / having some fun. Head over to the saltproject website and either download the .msi or .exe. Either run an install via cmdline using the following
Salt-Minion-3004-2-Py3-AMD64-Setup.exe /S /master=yoursaltmaster.testcompany.local /minion-name=test1or use the exe, click through the install just providing the name of your master (IP or FQDN) and the name of the minion (however you refer to it in your business)
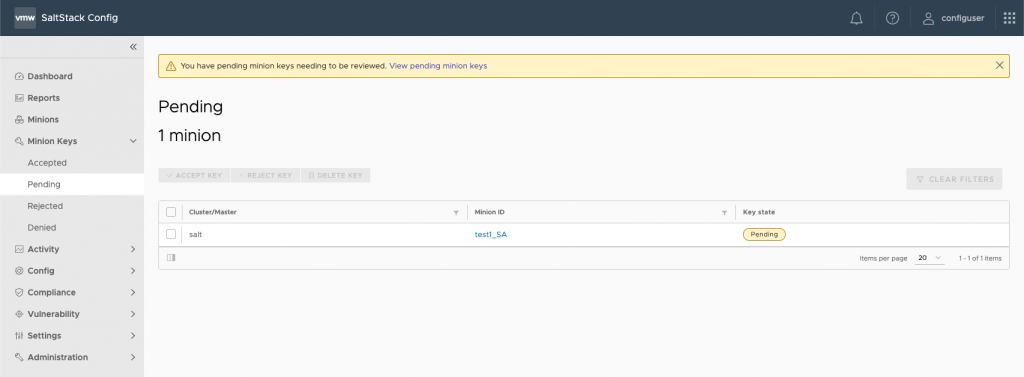
Once you’ve done that, head on into your SaltStack Config (SSC) console, and click into Minon Keys > Pending. You should see your server available to accept
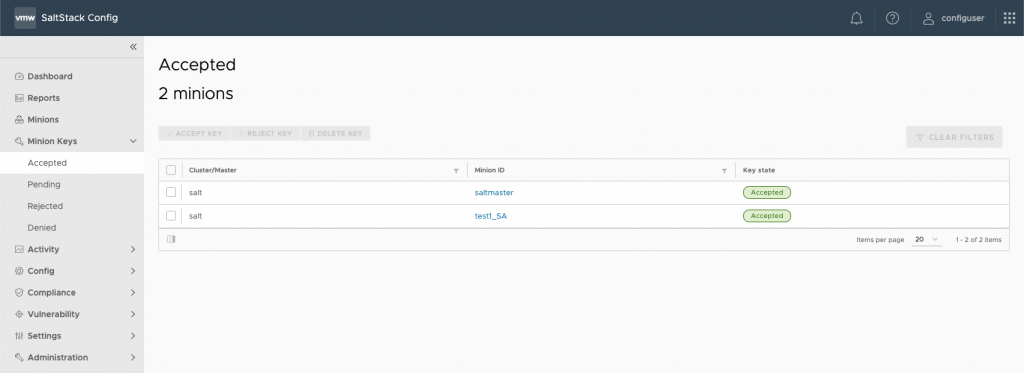
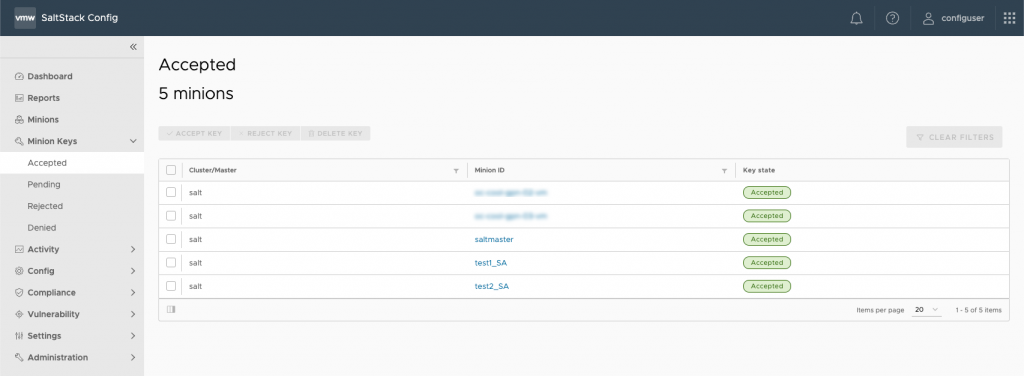
You should then be able to go into Minion Keys > Accepted and see both your saltmaster and new minion:
How to Install on Linux
So for the purposes of documentating compatibility, Salt will pretty much run on any flavour of Linux. At the time of writing there are installs for:
- Debian
- RedHat / CentOS
- Ubuntu
- SUSE
- Fedora
- Amazon Linux
- Raspian
Unlike the Windows install, there are 3 different options here:
Latest Release Gets the latest release.
Every update post-install will download and install the latest version whether its minor or major
Major Release Gets the latest major release.
Every update post-install will download and install the latest version but only if there is a new major release
Minor Release Allows you to install a specific release
Updating post-install doesnt change anything, it essentially pins the individual release you install.
I’m going with the latest release of Ubuntu 20.04.3 for the purpose of this install. So the install process goes like this:
# Download key
sudo curl -fsSL -o /usr/share/keyrings/salt-archive-keyring.gpg https://repo.saltproject.io/py3/ubuntu/20.04/amd64/latest/salt-archive-keyring.gpg
# Create apt sources list file
echo "deb [signed-by=/usr/share/keyrings/salt-archive-keyring.gpg arch=amd64] https://repo.saltproject.io/py3/ubuntu/20.04/amd64/latest focal main" | sudo tee /etc/apt/sources.list.d/salt.list
Once you’ve imported the SaltStack repository key and created the source list
sudo apt-get updateand then the installation of the various components
sudo apt-get install salt-master
sudo apt-get install salt-minion
sudo apt-get install salt-ssh
sudo apt-get install salt-syndic
sudo apt-get install salt-cloud
sudo apt-get install salt-api
Once its all installed, you need to edit the configuration file:
sudo nano /etc/salt/minionOnce in your editor (nano or vim, etc) define the master fqdn or IP and save the file
# Set the location of the salt master server. If the master server cannot be
# resolved, then the minion will fail to start.
Master: 192.168.50.2
Next we need to authenticate the minion, so we need to key the keys from the master:
sudo salt-key --finger-allCopy the master.pub key into your /etc/salt/minion config file
# Fingerprint of the master public key to validate the identity of your Salt master
# before the initial key exchange. The master fingerprint can be found by running
# "salt-key -f master.pub" on the Salt master.
master_finger: xx:xx:xx.....
Give your minion an ID whilst in that file by adding the following line. Mine is called test2_SA and then save your file.
id: test2_SAThen just restart the minion service and you should see the minion in the pending section within the SaltStack Config console (again under Minion Keys > Pending)
sudo systemctl restart salt-minionEDIT: One of my kind colleagues @ VMware has pointed out that its far easier to install minions than I first thought. If you visit here there are some simple instructions to allow you to do the install in just 2 lines (please see below)
curl -fsSL https://bootstrap.saltproject.io -o install_salt.sh
curl -fsSL https://bootstrap.saltproject.io/sha256 -o install_salt_sha256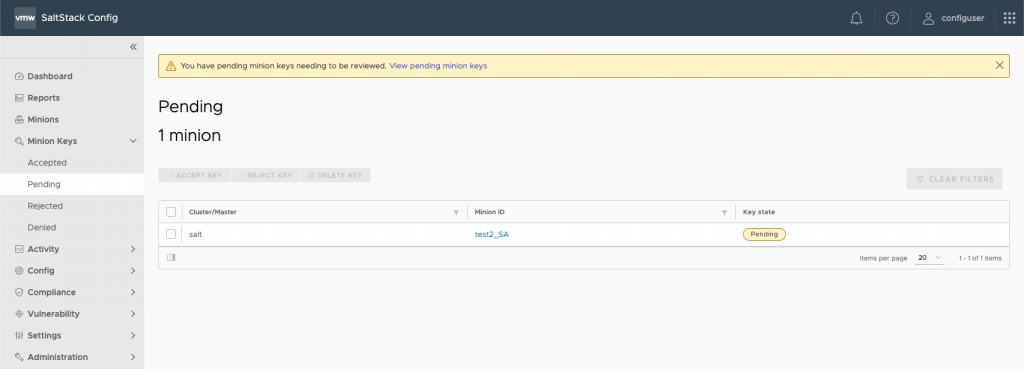
Just like Windows above, accept the pending minion and within a few seconds you should see it in the accepted tab.
Understanding How Salt works
So you’ve got a couple of minions out there, and you’ve got your Salt Master online, ready to get going. But how does it actually work? And what are the specific terminology. Here goes…
Grain
The term used to describe a specific chararacterist, or piece of information about a minion. For example, the OS type, the domain name, or IP address. Typically this data is pretty static, but can also change every time a collection of data occurs on a minion. Salt allows you to target minions based on the grain, essentially you can create targetting commands based on the the grain.
Target
Essentially a target is a group of minions that the master targets with a set of commands.
State
So remote execution, such as the installation of software is what Salt originally did, and it still can, but state files are the basis of configuration management. Essentially, a state is a YAML file which defines what the configuration of a minon should be. It uses state modules which are basically pre-canned functionality for common actions, ensuring that config management stays easy and away from complex logic and code.
Formulas
These are a grouping of one or more state files, optionally with pillar data to bundle into a package for a particular use. For example, setting a configuration standard for your Windows-based web boxes.
Pillars
Pillars are a way to store sensitive data or values that can be distributed to minions. If you’ve got a coding background, these are user-defined variable that are stored on your Salt Master and assigned to minions.
Mine
The outputs of minion executed commands (such as declaring a minion IP address) can be stored in a mine on the Salt Master and used to generate further configure something else, like the config on a loadbalancer for example.
This is the first of a few posts on SaltStack Config, as its something I’m quite eager to play with over the next few weeks, purely because of how powerful this can be. Hopefully the next post will be a bit more hands-on!
Edit: Next in the series has gone live: Getting Started with SaltStack Config – Part 2: Installing NGINX

Leave a Reply